| Tip | ||
|---|---|---|
| ||
|
Pre-requisite:
- Having a set up Arduino board on hand. (Can purchase through Spark fun)
Objectives:
- Setup the environment and see something happening
Descriptions:
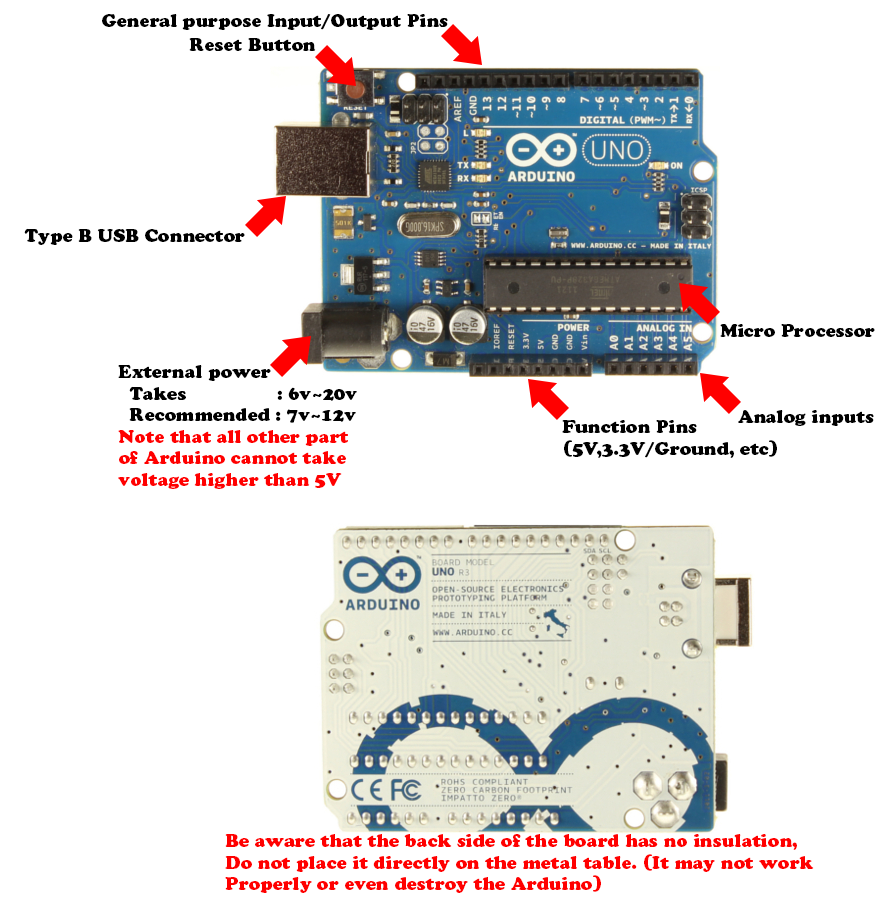
- Several key elements you have to know on Arduino UNO (What is Type B USB connector):
- Download and Install Arduino IDE
- The official stable release is 1.0.5, which in most cases is the one you want to get.
- However, if you are using newer version of Arduino like Arduino Due or Arduino Yun, You will need to download the beta release.
- Download according to which system you are using(Windows, Mac, Linux).
- For windows specifically, you need to install the Arduino IDE before you plug the board onto your PC, for how windows handles device Drivers differently.
- Connect the Arduino UNO to your Desktop/Laptop via USB
- If you purchase an Arduino, it usually comes with the correct cable
- In case you've lost the cable or the cable doesn't work, what you need is a Type A to Type B USB cable.(What are these)
- The computer will recognize the device
- In windows its COM# (# being a number)
- in UNIX-like system it's USBTTY (Mac/Linux/Solaries/etc.)
- Start the Arduino IDE
Should be something that looks like this:Anchor uploadprogramme uploadprogramme 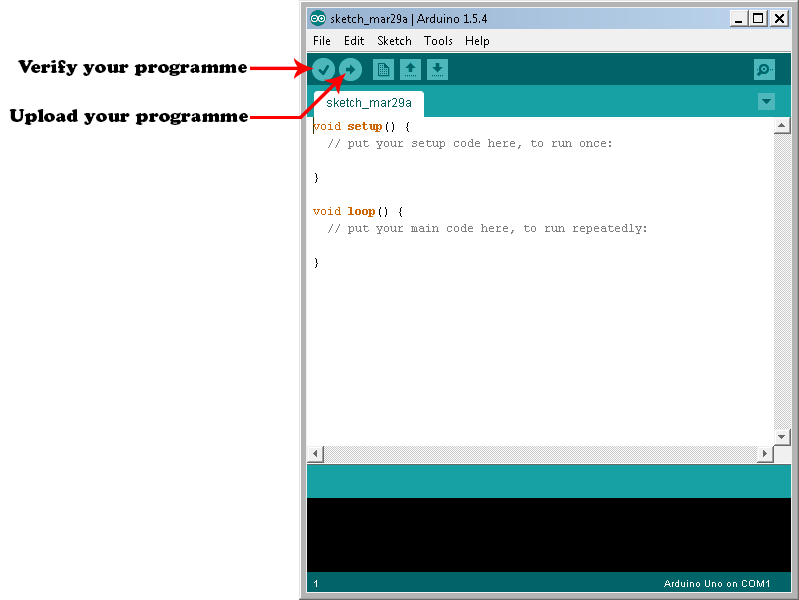
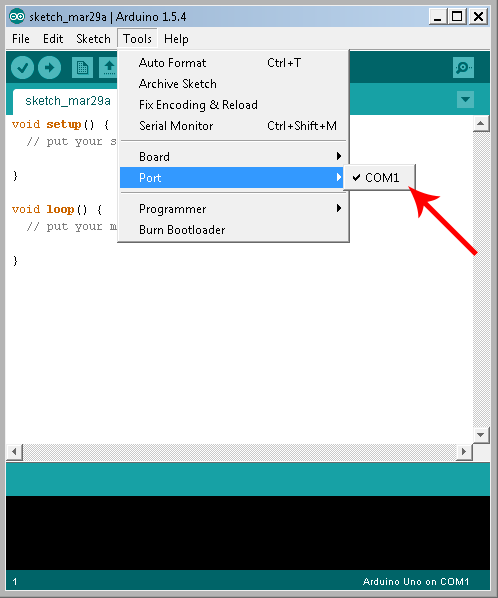
- Select which interface you are using for the Arduino
- For Windows, it should be COM# (# stands for a number)
- For Unix-like system (usually Mac for design students) it should be /dev/tty.usbmodem##### (# stands for a number or a character)
- Select the Board-type
- In our case Arduino UNO
- Select the board according to the board you are using

- Go to File → Example and under 01.Basics → Blink
- Open the example sketch

You will see a programme like this
Code Block language cpp title Example programme from Arduino Blink linenumbers true /* Blink Turns on an LED on for one second, then off for one second, repeatedly. This example code is in the public domain. */ // Pin 13 has an LED connected on most Arduino boards. // give it a name: int led = 13; // the setup routine runs once when you press reset: void setup() { // initialize the digital pin as an output. pinMode(led, OUTPUT); } // the loop routine runs over and over again forever: void loop() { digitalWrite(led, HIGH); // turn the LED on (HIGH is the voltage level) delay(1000); // wait for a second digitalWrite(led, LOW); // turn the LED off by making the voltage LOW delay(1000); // wait for a second }- Upload the programme to Arduino
- You should see the LED onboard blinking

- Try modify the "1000" in the delay function and see what happens with the blinking.
- Open the example sketch
Appendix:
Types of USB connectorsAnchor usbconnectors usbconnectors 